Photogram research
Christian Schald


Christian Schald is a photographer/painter who lived from 1894 till 1982 and use a method of photography called "Schadograph" which is an early method of abstract photography where the photos using camera-less photos which created pieces such as the piece called the schadogram where he covered light sensitive paper with numerous objects. The first impressions on the work intrigue me due to the work being quite simplistic but it also has so many possible meanings in the resulting works and my gut instinct on the work leaves me quite confused as the work is so simplistic. The work being "schaldgrams" means that the method of work for this is created by the artist which makes this work more intriguing as I want to know the exact method that was used for the art.
Man Ray


Man Ray also known as Emmanuel Radnitzky is an American born photographer created the "Rayograms" which is an early stage of the photogram. This made large effects on how I use objects during my photo grams. My gut instinct on this work is that the work is quite simplistic as the work involves either two or three pieces of work resulting in the work being simplistic in my opinion especially as the items used are every day items such as keys or a slinky
Laszlo Moholy-Nagy
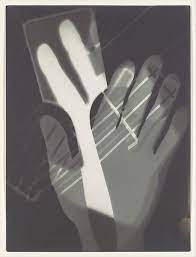

I like Laszlo Moholy-Nagy's "photograms" due to it including their hand which makes a large effect on the "photogram" and has provided me with multiple ideas for me to execute whilst in the dark room. The photogram is the final stage of Laszlo Moholy-Nagy, Man Ray and Christian Schald's work
My attempts on the artists work
|
I had numerous attempts to replicate work similar to the work of the artists above and made a few pieces they I enjoy
|
|

Ilan wolff
ilan wolff - moongram from Rayapixels on Vimeo.
The work that Ilan Wolff does amazes me, the so called "moongram" is more like an adventure to create the art as it is takes many hours to create it as well as it taking time to try numerous items by using red flood lights so that the work is not affected but they also use the moonlight for the work as well as using a device with a bright light at 00:45 which is a large effect on the work. For this to work they put up a roof above the work (seen from 00:42 till 00:50) so that the moonlight won't interfere with the work. at 00:52 there is a use of three chemicals for the work, most likely stop, developer and fix which will effect the effectiveness of the light as if the work is not left long enough in developer but too long in fix it will have a large effect on the work as the work will be damaged. From 01:06 there is different types of watercolored paint which he then used a shade of green and then lightly spreads it across the large sheet slightly dyeing it resulting in a nice end result
Lucas Knipscher


Lucas Knipscher's work is inspiring due to how the work is organised with colour in a way but also due to the organisation and patterns within parts of the photos providing a good first impression. the photos is locatable on the Thomas Duncan Gallery where you are able to review numerous pieces of Lucas Knipscher's work and I believe that the purpose of the work is to make you feel whats going on in a way as when I look at the images and see the patterns I can imagine in a way what it feels like meaning that the work would be more interesting in comparison to other artists work . The style of the work very different in comparison to the other artists where there is an attempt on visualising the patterns within the work but with Lucas Knipscher's work the patterns are visible so there is a opportunity to think about how the patterns will feel, this means the work will draw attention to how the work also has colour for what it does.
The second attempt in the darkroom
|
|


When in the dark room I decided to use four pieces of A6 photographic paper to experiment as well as to build up to creating a final piece of work on a piece of A4 acetate where the results were constantly improving at a constant rate causing for there to be a blatant improvement constantly
Final Project


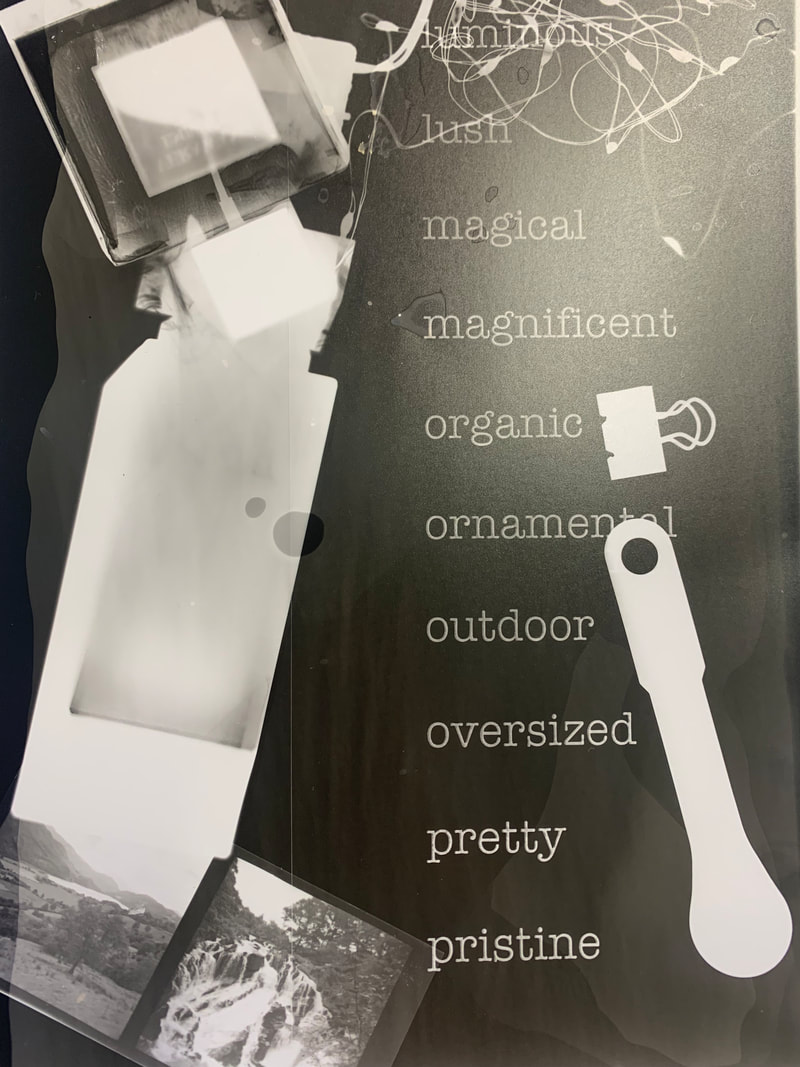
For the my final piece I used two pieces of 10x8 light sensitive paper so I can have two pieces that I believe can show some of the best of my work instead of having the work appear like I have not consulted multiple methods of dong the work. Which in my opinion makes the standard of the work better as I am not stressing about how the single piece would look. In the first image has numerous translucent pieces such as bottles as well as a plastic container/tray so that it would create a certain effect onto the art work which makes it look like there are layers that you are able to see through and the layers makes it so the factors that went into this work was that the aperture was at 5.6 as well as having the piece of photo/light sensitive paper under the light for 6 seconds. Whilst with the second piece of work contained a few other pieces such as paper clip chains, string and also it has a darker background due to there being less layers for the work which is a choice that I made due to thinking that there needs to a contrast with the items on the top and the hand made negatives which resulted in the work appearing much nice in my opinion.
Lumentypes


the exposure of a negative on a piece of light sensitive paper under the sun is how to make a lumen-print. Lumen prints are pieces of material, for this instance it was plants, which is laid upon a piece of light sensitive paper and then placed into a frame to ensure that the materials stay in place and then left on a windowsill for a week so that the light sensitive paper reacts to the sunlight which leaves the places where the materials were unaffected by the light making the outlines of the materials the same as the original paper. I really enjoyed the creation of the lumen print due to the work being over a long period of time as well as the work and the choices of plants that I used either had light connotation on the paper or it had obvious connotations on the paper. To improve I would include more pieces of plants due to it creating more patterns of the plants on the paper as it had areas unaffected but otherwise I believe that I had done very well. the photographic process for this is to place silver gelatine photographic paper, more commonly known as light sensitive paper, in sunlight for a set duration of time. The choice of using flowers is due to the flowers having a certain water density causing the patterns on the paper to be more distinct.
Cyanotypes.
original photos


The images in black and white and then inverted


The negatives of the original image
Step by step progress for Cyanotypes


For the Cyanotypes it began with making a mixture of ammonium ferric citrate, potassium ferricyanide and distilled water which is used for the actual cyanotype paper which is created by using a sponge brush and covering a piece of paper with the mixture as it then becomes UV light sensitive. Afterwards you need to create a homemade negative through photoshop, the method for this is by choosing a photograph and placing it into photoshop and then afterwards you follow the steps shown in the images above and afterwards you print the image on A5 acetate and then place the homemade negative on the previously created cyanotype paper and use a weight that does not affect the amount of light that the cyanotype paper will receive. After doing this you want to place the cyanotype paper with the homemade negative laid on top and they place a transparent weight on top of all of that for half an hour for more accurate results. To finish off you submerge the cyanotype paper in water and remove all the yellow from the piece and to finish of place it in a clean, flat, vertical surface and wait for the result.
Cyanotype Artists
Walead Beshty


My initial thought about Walead Beshty's work is that there is an overwhelming sense that there is too much stuff paced into one place but at the same time the further you look into the work the more that the depth of the images are intriguing as the photos all link into each other due to the theme of the work
Pinhole camera


To make the pin hole camera it is simple. To begin with you will make a container such as a iPhone box but in this instance it was a small Pringles can, to start cut out a small hole from the camera which is roughly 2cm x 4cm wide. Once you cut the hole you should use sandpaper on the lid of can as well as the bottom of the inside of the Pringles can due to it being an metallic material and then afterwards paint the inside of the can black with black acrylic paint once everything has been sanded down due to it being the colour which absorbs the most light. Afterwards you cut out roughly a 3cm x 6cm piece of aluminium from a can, and then place it on top of the hole due to it after placing a small pin slightly through the aluminium. Afterwards you place black tape over the the aluminium except from the pin hole. so light can come through. You are also able to make a cover to place over the the pinhole which is easily movable with a latch so that light is not always going through the hole and afterwards it should be successful.
Pinhole camera images


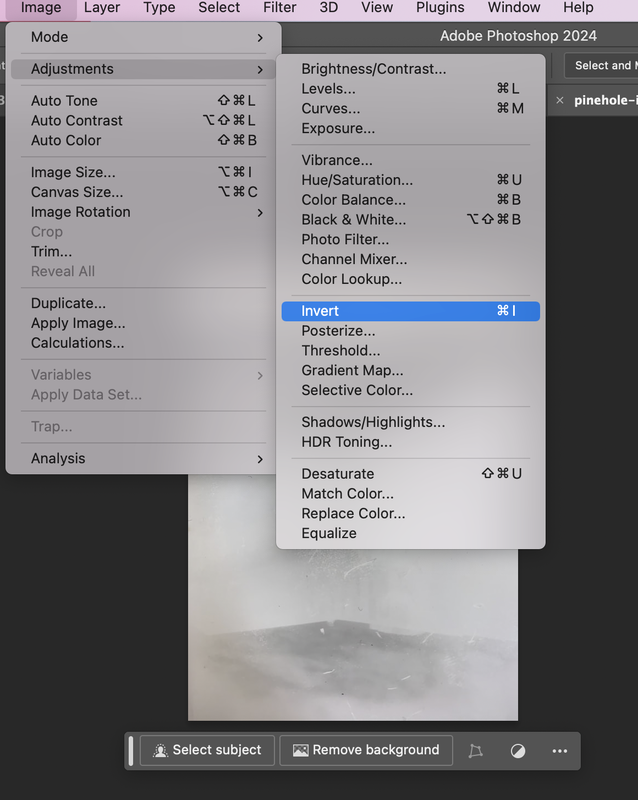
On photoshop this is how you invert the images
Inverted Pinhole camera images


Instructions:
1. added research + one pin hole photographer
2. Included photos of the camera
3. photoshop instruction photos
4. Evaluation
1. added research + one pin hole photographer
2. Included photos of the camera
3. photoshop instruction photos
4. Evaluation
Dimosthenis Bitras


Dimosthenis Bitras's work intrigues me due to the work being consistently on people and their appearance which although is common the work has many pieces which intrigues me as the work is consistently
